The material I'm using is 152mm x 76mm U-Channel and 76mm x 6mm flat bar.
I'm using the chassis brackets of the original towbar to make things a bit easier.
The total weight of the bumper so far is 42kg, and the only things outstanding are the recovery points Carrier's and paint.
I'm considering removing access metal on the inside en bottom of the bumper to make it lighter.
This is the raw U-Channel I used as the main frame.

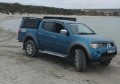
This is just a rough idea of what it will look like.

Front view of the raw bumper, carrier points, recovery points and paint work still to be done.

Rear view of the bumper with the original towbar chassis brackets.

These are the type of weld-on D-Rings I want to attache to the rear of the bumper, in line with the mounting brackets going to the chassis legs.


More photo's of progress to follow, any comments or suggestions welcome.