Goodday all
Hope you had a fantastic season. May 2017 be your best year ever.

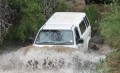
Its been a while since I have updated this feature. Between moving house and being broke, Its been tough to wrap up this rebuilt. Although not completely finished, Its back on the road since November last year and doing what Hiluxes do best - get you there…wherever there might be.
Anyhow, I summed it up a bit since my last post, for a quick read.
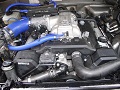
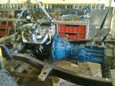
I spent a lot of time either fixing or replacing bent or damaged parts. And I found most of my lost bolts and parts.

Below some of the mechanical parts replaced and fixed. Mostly on the drivetrain.
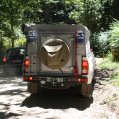
Once the van was back on its wheels, it was time for the rear to be attended to. I am completely hooked on the Trayback camper idea and decided to build what would my tourer with a trayback /loadbay camper.
I bought this loadbay off an older hilux from a gentleman in East London. It once belonged to a furniture shop delivery vehicle.
The loadbay floor covering removed . Tough joppie this. Oy…

Loadbay temporary fitted onto Lux. Very wide.
I grinded it down to 1800 x 1800 size. Just a bit longer than a normal loadbay with the rear open.
Time to get it to the spraypainters:
Met an extremely good craftsman with a passion for his work. This guy left no nothing to chance.
The van was completely stripped to the bare and cleaned up. It seems like the previous panelbeater worked in the dark on the van. It was in a rollover and the new roof was fitted skew. So we took it off again for a refit. Also had to replace the left a –pillar. The old one all plastered up. One surprise after the other when we really got down to the nitty - gritty

With that we ensured that the shoddy work done on this vehicle was a thing of the past.

I did a lot of shopping. New spec lights, bonnet, fenders, fender flares and even a dashboard. The old one had a lot of scratches on it. And by luck while on an unplanned visit to a scrappie, a bonnet scoop. My lucky day.

I spent hours trolling Gumtree and bought stuff from all over the country. Seriously, Pretoria, East London, Cape Town, George, Rustenburg, Put Sonder Water etc. Only one deal went sour. R1700 down the drain. Took that punch on the chin and moved on.

Nearly finished.

Now for the loadbay;
Sides welded on. Decided on a matt black look.
And for my Birthday, new steelies. I love these rims. Had a set on my previous bakkie. Happy happy to me.

TADA!!!!
Happy days
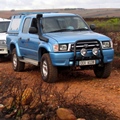
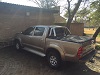
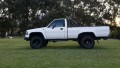
Before
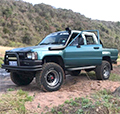
After
Everything works mechanically and I still managed to make it look like a Hilux.

Objective 1 achieved.
Now for the second part , getting the camper finished. The design is completed and I am ready to build. I hope to have it completed by the end of Feb this year. Just sorting the moola issue.
Its been a tough journey this one, but an enjoyable one. Thankyou to all for the positive feedback during this build. Much appreciated.

Will keep you posted on progress of the camper build.