|
|

|
|
Toyota Hilux IFS Tow bar modThe standard tow bar of my 1999 2.7 Hilux sticks out too far at the back and I decided to move it closer to the body. Most Hiluxes with the standard tow bar have the same problem, even some of the SFA Hiluxes. The reasons I wanted to move it closer were:
You will need:
I wanted to move it back 110mm so that the end of the tow bar can be in line with the end of the vehicle.
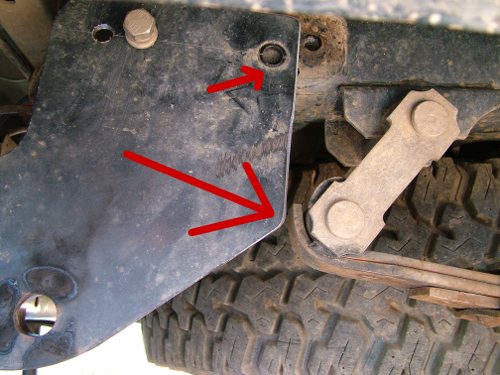
In order to remove the tow bar you have to remove these three bolts on each side. I previously fitted the plug to the back of the vehicle so in my case it was not a problem but if your vehicle's plug is fitted to the tow bar remember to remove that first before loosening the tow bar
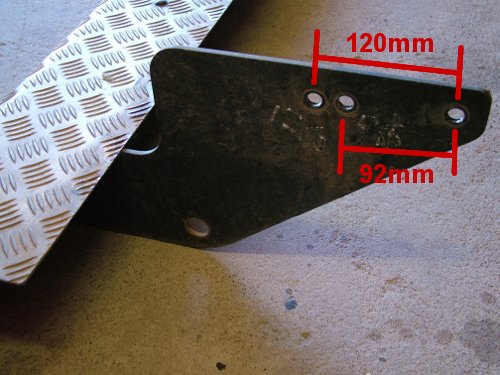
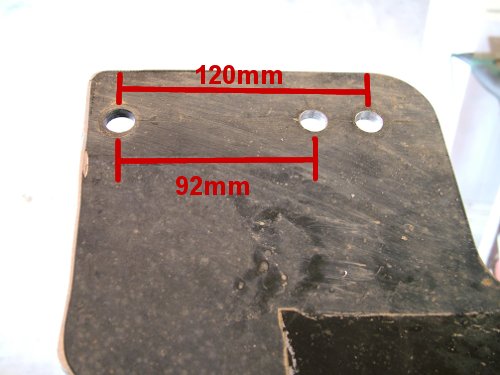
With the tow bar removed I realised that I will not be able to move it 110mm. The reason for that is that the two holes at the back are too close to each other. You can use one of these holes to replace the front hole but this means that you can either move the tow bar 120mm or 92mm forward. I decided to go for 120mm BUT IT WAS NOT THE BEST OPTION. I suggest you rather go for 92mm. This means that you will use the middle hole as your new front hole. At the end of the report you will see why I say 92 is the better option.
With the tow bar removed you must now remove the checkered plate from the tow bar. Do not bother trying to loosen these bolts. Chances are good you will not be able to get them loose. So just take the grinder and cut them off.
Once you removed the checkered plate you also have to remove the brackets by using the grinder.
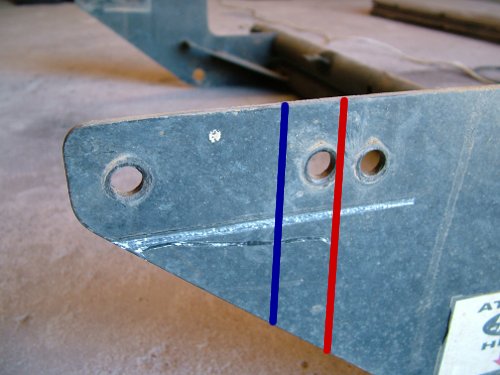
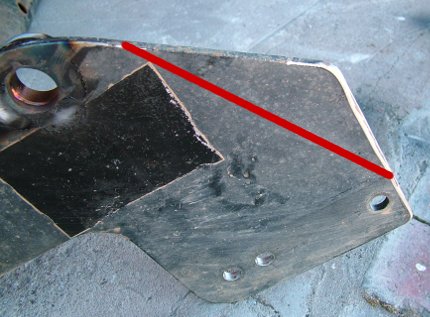
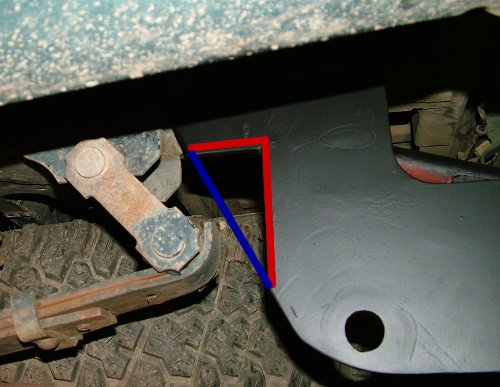
Now you must cut off the end of the tow bar bracket. NOTE that I cut mine between the two holes (red line). If you are going to move it only 92mm as suggested you will cut the bracket about 15mm in front of the middle hole (blue line) so that you can still use the middle hole as your new front hole.
Now mark and drill two new holes. On my tow bar the holes was 92mm and 120mm from the front hole. Before you drill the holes measure the distances on your vehicle to make sure if it is the same. I suggest that you first make a mark with the centre punch before you start drilling. When drilling it is always best to first drill a small hole like about 5mm. The make it bigger, to about 8mm and then only drill your final hole which should be 13mm in this case.
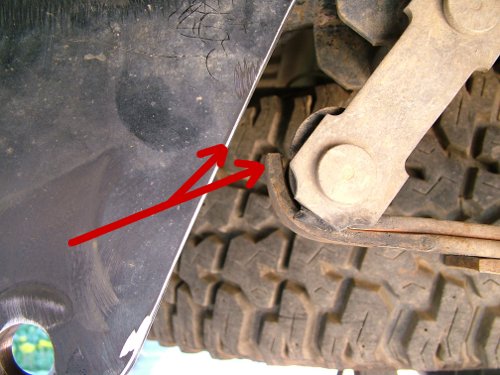
After drilling the holes I wanted to fit the tow bar but found that it was in the way of the spring pack. So I had to remove it and change it.
So I just cut it as indicated above.
I fitted it again and still the gap was too small. In the end I cut out a square piece so that there is enough space for the spring as indicated below. The blue line is where it was and red how it is now.
If you only want to move your tow bar you now just paint it and refit it. But there are some other mods you can do to make the tow bar even more functional. If you are interested read on:
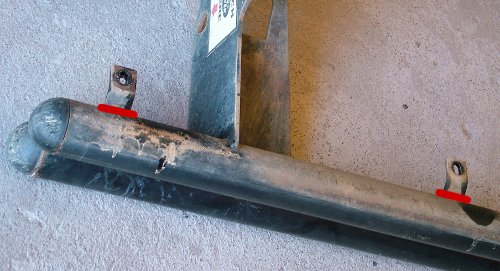
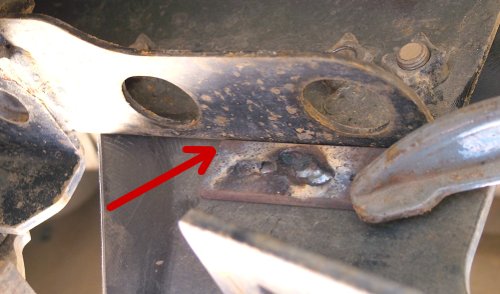
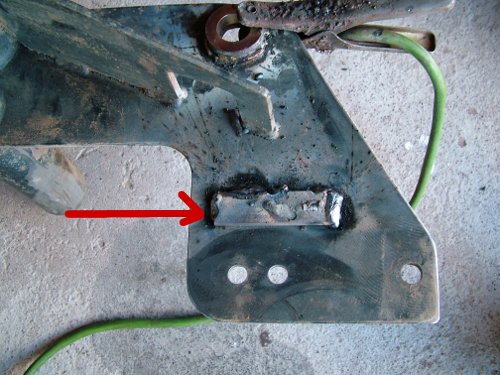
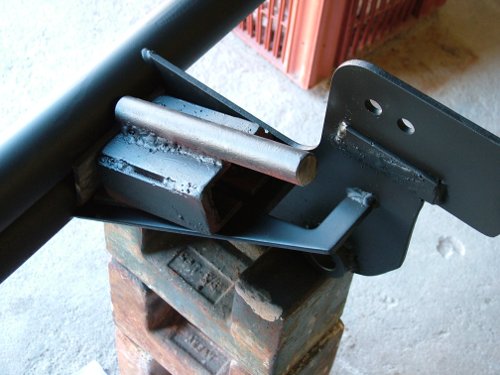
Before I removed the tow bar again I first welded a piece of flat bar on the inside of the tow bar bracket just underneath the chassis. Remember to disconnect the battery before you weld on the vehicle and ONLY weld on the tow bar, not the chassis. I added this flat bar in order to prevent the tow bar from moving up when it hits a rock. Previously this frequently happened, as soon as the tow bar hit a rock on a trail it will be skew. This flat bar will prevent that from happening in future
I just "tacked" it to the tow bar on the vehicle. After I removed the tow bar again I welded it properly. REMEMBER NOT to weld it at the top (chassis side)
I also cut off the end of the bottom pipe. This will help with a better departure angle. This was easy, just take the grinder and cut it off. I cut it about 20mm from the main bracket.
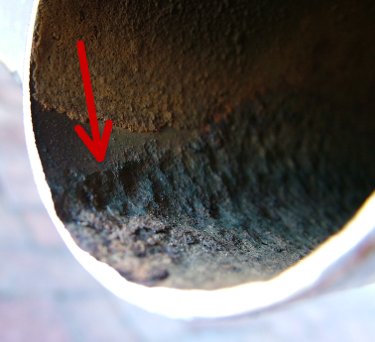
Just for interest sake look at the corrosion inside the lower pipe of the tow bar Keep in mind that the vehicle is ten years old this year. But still this does not look too good. I guess I will replace the tow bar completely in the near future.
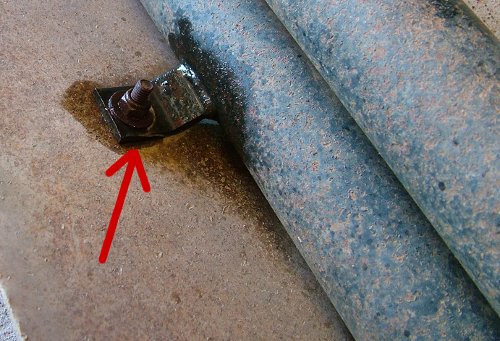
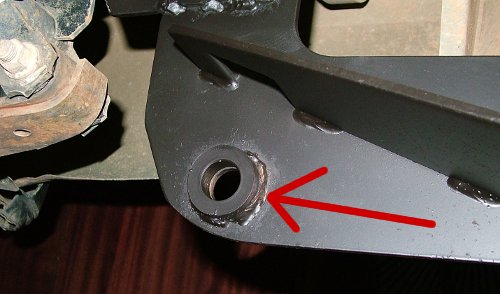
Because there is no recovery point at the back I drilled a 25mm hole on the bracket at the bottom. I actually did this long ago (see first photograph in this article). Today I just added a collar to it so that there is more body to make it stronger. This collar was a piece of stainless steel that was laying around the garage. If you want to you can have one made from mild steel It must have an ID od 25mm, OD 50mm and must be about 10mm to 15mm thick.
On the inside of the tow bar are nice big supports. I found this to be a great place to store the bracket I use for the high lift jack. This is not the usual ones you buy at the shops, I over designed and built it myself. So it is a bit heavy and is always in the way. So finally I got a nice place where it won't bother anybody.
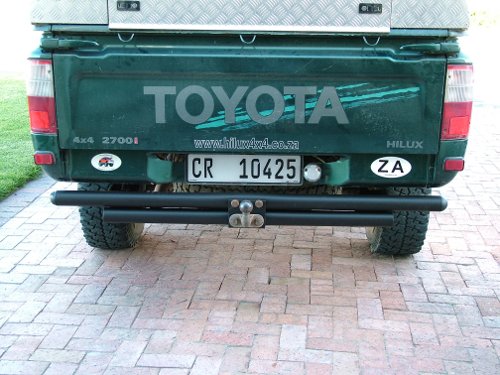
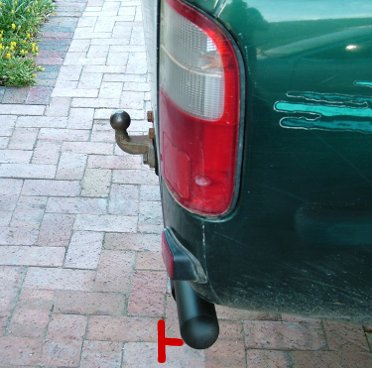
From the rear the tow bar looks lower than it used to be. But it is actually the same height, it just appears different. I think it is because the checkered plate is not there anymore.
Note how deep the tow bar is in. This is why I said that 120mm was too much. I think it would have been better to move it only 92mm. The way it is now it offers no protection at the back If I only moved it 92mm I think it would still stick out at the back just enough so that at least it can offer a bit of protection the the corners at the back.
|
|
|
|