|
|

|
|
Overhauling a SFA Hilux Front Axle - Simon MorrisSo now it is time to fit the metal backing half moon plates to the rear of the swivel hub, if you look carefully at the other photo you will see that the felt gasket must be put on first, then you get the rubber seal and then the metal split flat ring, the flat ring fits into the groove recess on the back of the swivel hub housing, there is no torque for these bolts but you can just tighten them using a size 10mm short spanner, the reason why I say use a short spanner is because you will not have lots of leverage so that you will snap off the small bolts if you over tighten them. But I did use a torque wrench set at to start with at 10nm, then used a spanner.
You
have to make sure that you fit the half moon plates the correct
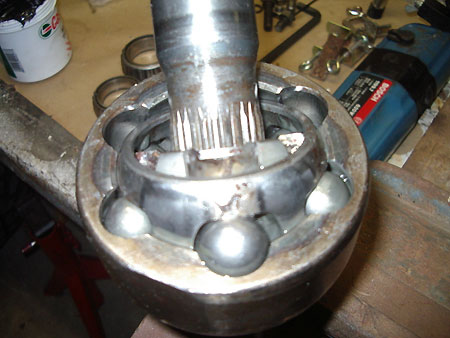
way, see the above photo for details. Now comes the messy part, you can wear some surgical gloves but I prefer to just use my bare hands and fingers, get a better feel if there are any rough edges. This photo below
shows you what the basic Birfield Joint looks like, this is the
joint that sometimes people break when they force their vehicle
through a difficult section of the trail, but there are also other
factors that will influence this joint to break as well, high speed
thrashing a vehicle to get through a difficult section will also
break it, also huge tyres fitted to a vehicle, this is why I say
that a person who wants to fit huge tyres to their vehicle must
consider the fitment of Longfield side shafts,
Once you have
cleaned out this joint, make sure that it is dry after you have
washed it with water, then basically inspect the housing and balls
for wear, mostly you will not find anything wrong with it, if you
are unsure, then send me some high resolution pic's to my email Place the shaft in a vice like in the pic above, then make sure that your hands are clean, take one last sip of your beer, because it will be a while before you can pick up the bottle again. Grab a tub of CV Joint grease also known as MS grease, scoop some out with your index finger and then start to push it down into the joint, it is quiet easy, if you are in a climate that is very cold, you can heat the grease slightly to make it more easy to work with. So have a look at the pic below and you will see just how messy this small important job really is. But before you insert the shaft back into the axle housing, first check that you have fitted the small inner axle housing seal, on the right side it is more easier than on the left, because the pumpkin is closer to the right than on the left side, spread a little oil on the seal runner surface, to be able to insert the axle shaft back through the swivel hub, you have to make sure that the flats of the Birfield joint are in the correct position, the shaft will not go back any way, only with the flats to the top and the bottom, once into the housing you can turn the shaft, you might find it better to jack up the left wheel slightly off the ground so that you can turn the wheel so that the splines of the centre diff will line up with the splines of the side shaft that you are inserting to locate inside the
Now clean away any excess grease from the flat surface where the gasket goes between the spindle axle shaft and the swivel hub housing, clean the metal surface with some meths to make sure that there is no oil substance left on the metal, now smear some silicone gasket maker on both surfaces, but not too much, fit the gasket and then the axle spindle. Torque the bolts to 60nm and test with a spanner afterwards. Now we go to the wheel bearing hub, however as I said earlier in this topic, one of the wheel studs was broken, thus to remove it, place the bearing hub which also consists of the brake disc on a nice flat piece of wood on your wood bench, use a round steel chisel that is smaller than the OD of the wheel stud and give the drift a few light taps with a hammer, the stud will come out, you have to just use a bit of common sense to determine which direction the stud will come out, you will see that there is a top hat section to the one side of the stud, tap the stud on the broken off section. Once you have removed the broken stud, use some copperslip or anti corrosive paste, smear a little on the shank of the new wheel stud, insert the stud and then use the same drift, just tap it into position until the top hat section is flush with the inside of the brake disc. Be careful of your fingers, otherwise you will loose a nail or two and I can tell you that is sore. Now take another suitable chisel or drift and have a look inside the bearing hub, you will see the bearing cups, they come out one way only, if you are looking at the hole, they come out towards you from each end, you will see a small area that is just big enough for you to be able to put the end of the drift against the bearing cup, give the drift a few taps and the cup will come out, sometimes if you battle you may have to smack it harder or use a hydraulic press instead. Now to refit the new bearing cups you must once again smear some anti corrosive paste on the outer surface, this will make them easier to remove the next time you have to change the wheel bearings. You do not have to worry about getting the bearing cones mixed up, they are not the same size, however it is always better to just use a cable tie through the one so that when you have greased it, you will know where it goes, to grease a wheel bearing cone there is only one way and what I find is the best way to do this is to smear some grease we once again use MS grease for this application, do not use wheel bearing grease we find that wheel bearing grease will not work well here, because when you reassemble the manual locking hub, the MS grease in the hub will mix with the wheel bearing grease and then you will have a gemors, we have also found that the MS grease can handle the water if it enters the wheel bearing cavity. To grease the wheel bearings, use the palm of your one hand, put grease in your palm and then use your other hand and grip the bearing and push the wider side where the rollers are up against the flat of your palm, this will force the grease in between the rollers so that you will see it come out the other side, do this the whole circumference of the bearing cone, then place the bearing in a clean place, do the same to the other bearing, before you put the inner bearing into the bearing housing, first smear some MS grease into the housing, not too much because if you do overfill the housing your wheel bearings will overheat.
This photo above shows you that once you have fitted the wheel bearing axle shaft, you must remember that you still need to fit the brake disc backing plate, there is also another metal plate that also has a rubber seal mounded into the plate, you fit this plate with the seal lip towards you, see pic. Then screw in the bolts and torque. Some more photo's showing the backing plate as well as the axle shaft all in place
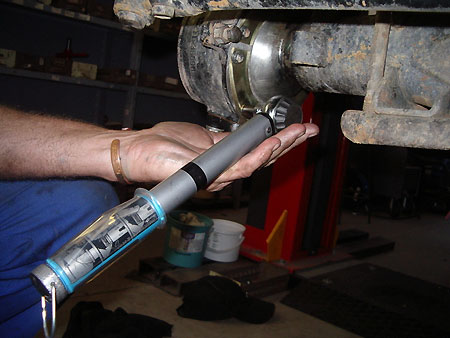
Note in this photo below, the three different size torque wrenches, they are for the various torque setting sizes that are required, these wrenches are very expensive, thus do not drop them, the smallest size costs R1200.
Tapping out the broken wheel stud below
Photo showing where to tap the bearing cup to remove it
Photo showing what the area looks like where the bearing cup was positioned
Photo
showing my dirty fingers
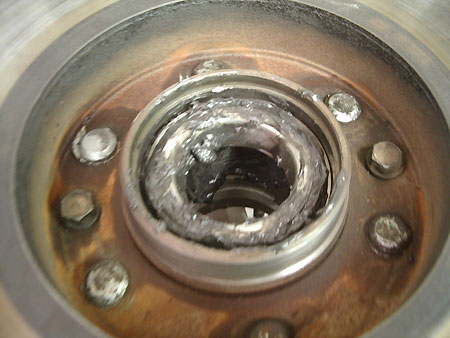
New bearing with grease sitting in position, now you have to fit the seal, the dished part of the seal goes towards the bearing, the flat side must be tapped in so that the flat side is flush with the bearing hub
Parts to buy when you overhaul the front axle of a Toyota Hilux solid front.
Please note some people might disagree about me using CV Joint grease on the wheel bearings and in the swivel hub, however it works for us, maybe you would prefer to use wheel bearing grease on the wheel bearings and 90 gear oil in the swivel hub
|
Back to main page | Back to previous page | Back to article main page |
|