|
|

|
|
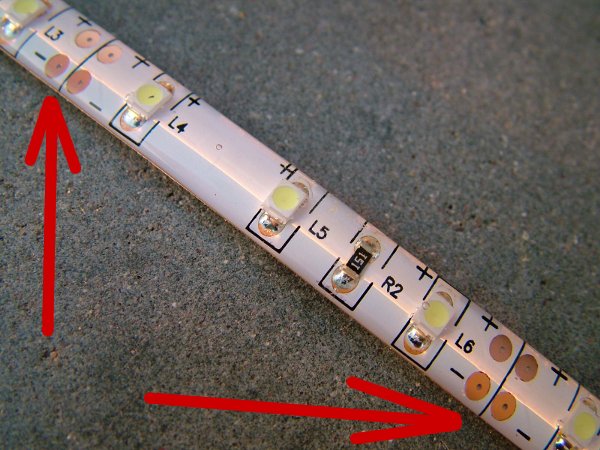
LED Strip installationYou can cut the LED strip at the points marked below. Depending on the type of LED strip there should be 3 LEDs per section. The LED strip i sell have 60 LEDs per metre, thus you can cut it at every 50mm and it will have 3 LEDs in 50mm. You do not have to cut it, you can even use a complete 5 meter roll as it is. You can use normal scissors to cut the strip.
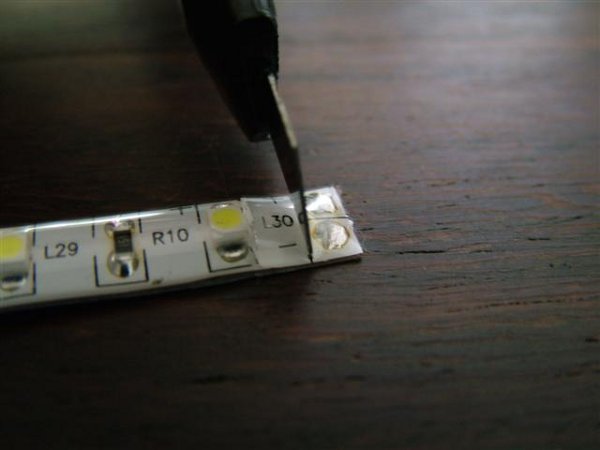
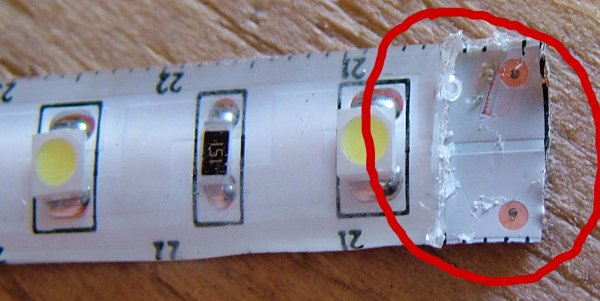
After you cut it you must first remove the silicon layer before you can solder some wires onto the contact points. Take a carpet knife and cut into the silicon layer. The white backing is rather hard so you do not have to be too worried that you will cut through the whole thing. If you cut too hard you will cut through it, but the backing is a copper circuit board so it is not that easy to cut through it.
Now you put the blade of the knife between the white backing and the silicon layer and peel off the silicon layer
Sometimes you will be lucky to cut it on a joint where there already is soldering (like in pictures 2 and 3 above), then you can just solder the wire ends to it. Sometimes you will have to cut it on non-soldered joints like in the first picture and then you have to follow the steps below. Sometimes the silicon will come off nicely and sometimes it will also take the white layer off. Do not worry about that because if the white layer is off you are on the copper backing where you want to be. It will now look like the picture below. You can also turn it around and remove the double sided tape in the area where you will solder. Make sure all the silicon has been removed from the area where you will be soldering.
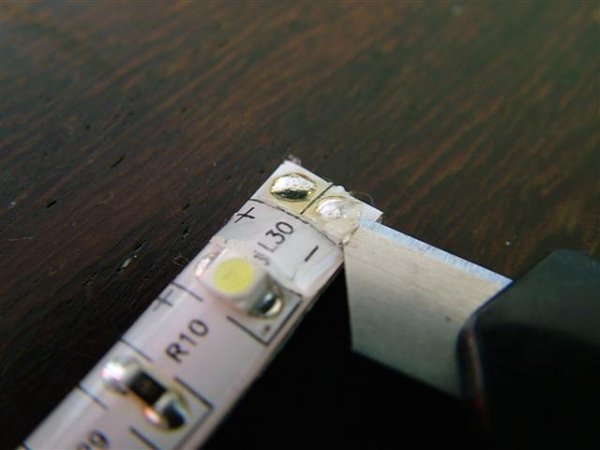
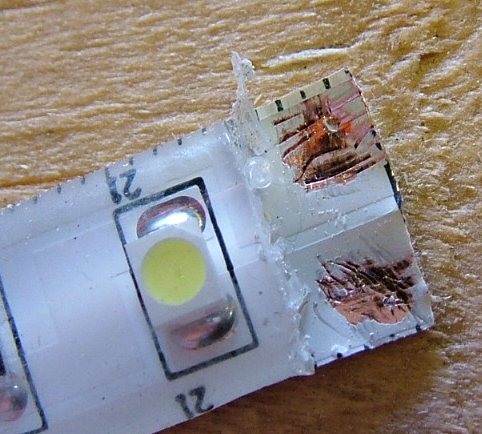
Some of the latest models I imported have small contact points. After you removed the silicon it is better to first scrape some of the white paint off in order to open a wider contact area to solder on. See the next photograph.
Also note that on these new models the + and - signs are not on each cutting line anymore. If you bought a metre or more and you cut it into pieces yourself you must make sure there is a + and - Sign on the shorter piece, otherwise you have to make a mark yourself so that you know which side is which polarity. Now add a drop of soldering on each of the points on the strip.
Then add soldering to the open ends of the wire you will be attaching.
Then it is easy, just put the wire on the solder drops on the strip and heat it a bit with the soldering iron, you will see that they fuse very easily.
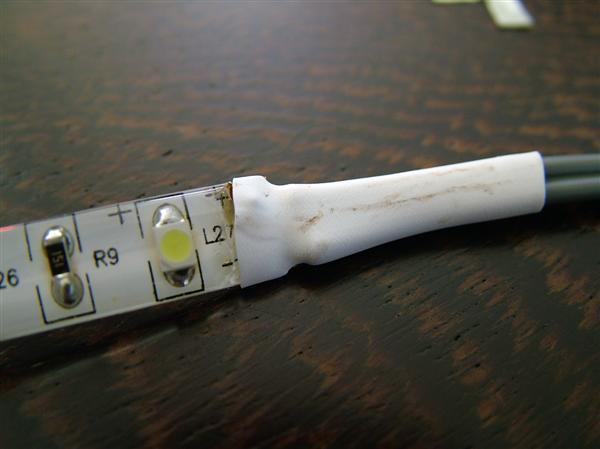
I bought myself some 6mm Heat Shrink. You can put the heat shrink over the area. This will not only isolate it, but also help to keep it stable so the joint do not come loose that easily.
For those who do not know heat shrink, you put it over the joint loosely like in the pic above. Then you apply heat with a heat gun and it will shrink tightly around the wire and joint. If you are too lazy to walk down to the garage to fetch the heat gun (like me) you can also use the soldering iron to heat it, it works just as well but normally laves some marks on the heat shrink as you can see in the picture below.
|
.JPG)
.JPG)
.JPG)
.JPG)
.JPG)